How to Prepare Curated Alias
This guide explains how to prepare an alias file and use it as the Curated alias that will be displayed for a factor layer by default in CartoScope.
1. Prepare Your Alias File
Alias File Format
- The file must be a tab-separated file (
.tsv) with one row per factor. - It should contain two columns:
- 1st column (header: either
indexorname): numeric factor indices. - 2nd column (header:
alias): alias names.
- 1st column (header: either
Example Alias File
1 2 3 4 | |
Prepare Alias File via CartoScope
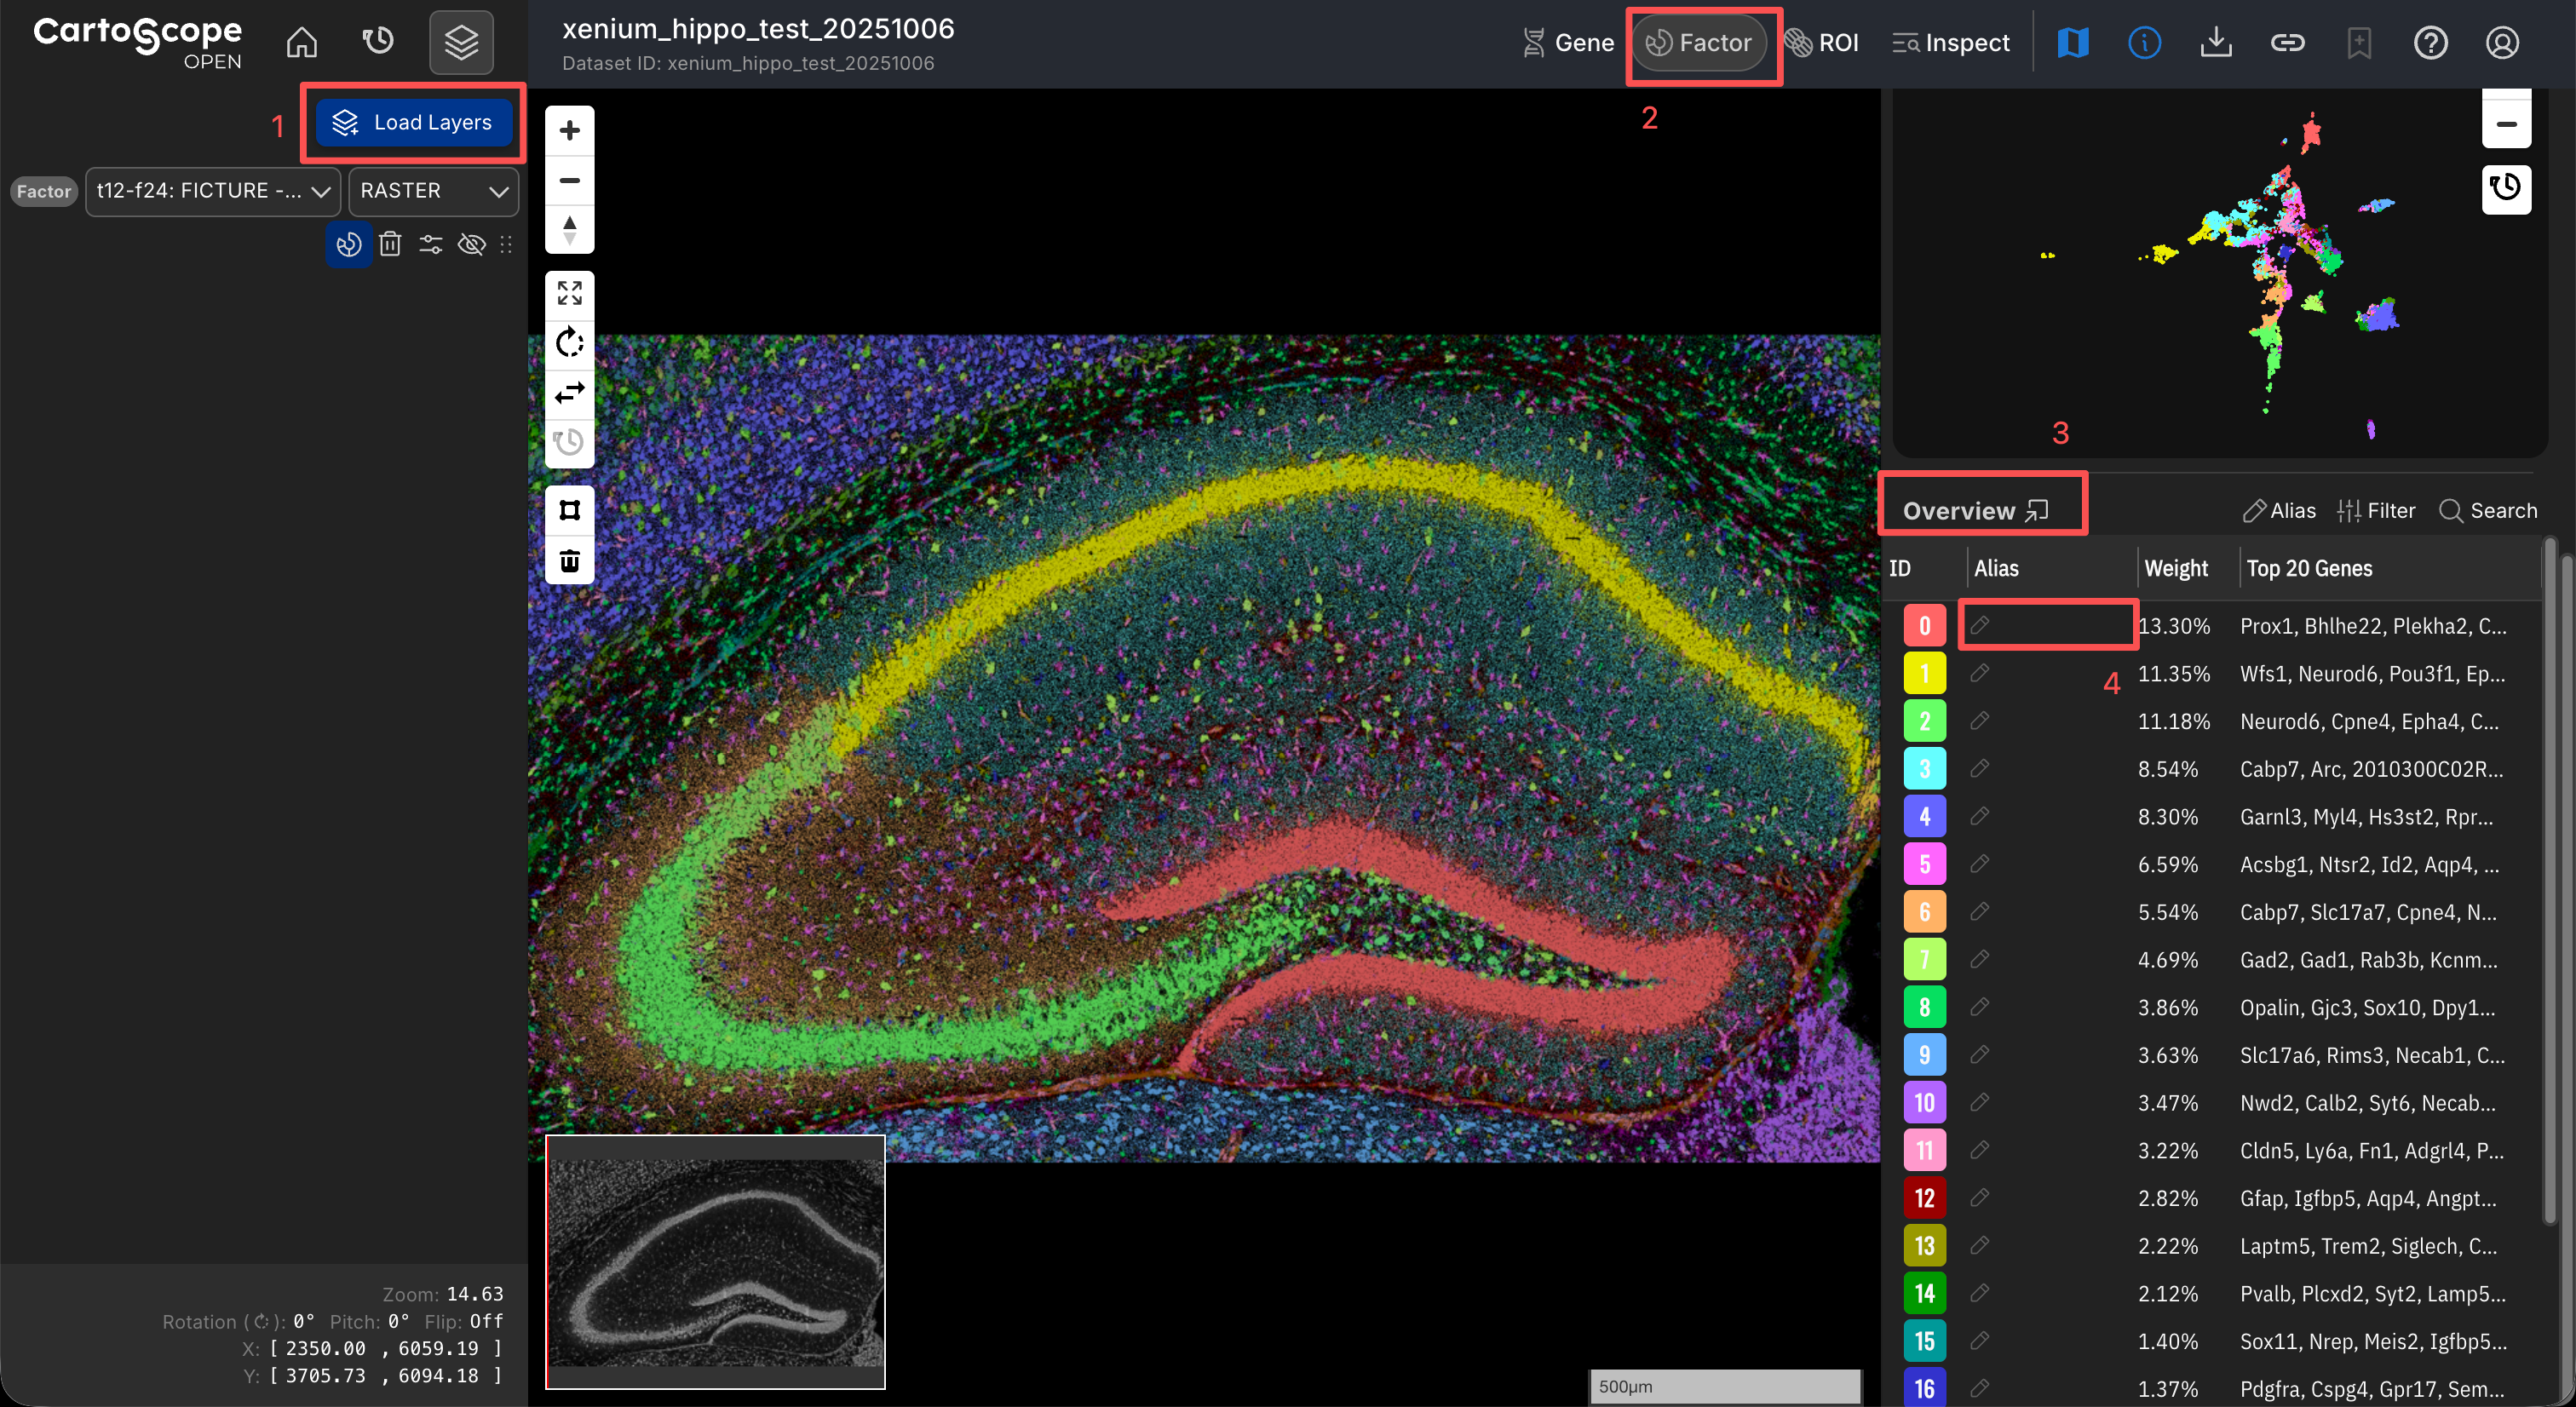
CartoScope offers a solution to prepare your alias file during exploration.
- Click the Load Layers button to load the factor layer you want to annotate.
- Open the Factor Drawer to display your target factor layer.
- Review the Overview Table to determine whether existing alias sources (e.g., curated or AI-inferred aliases) are available.
- To annotate a factor, double-click the corresponding cell and enter your desired label.
- Once all annotations are finalized, click the Alias button at the top of the Overview Table and select Export Alias to generate and download the
.tsvfile.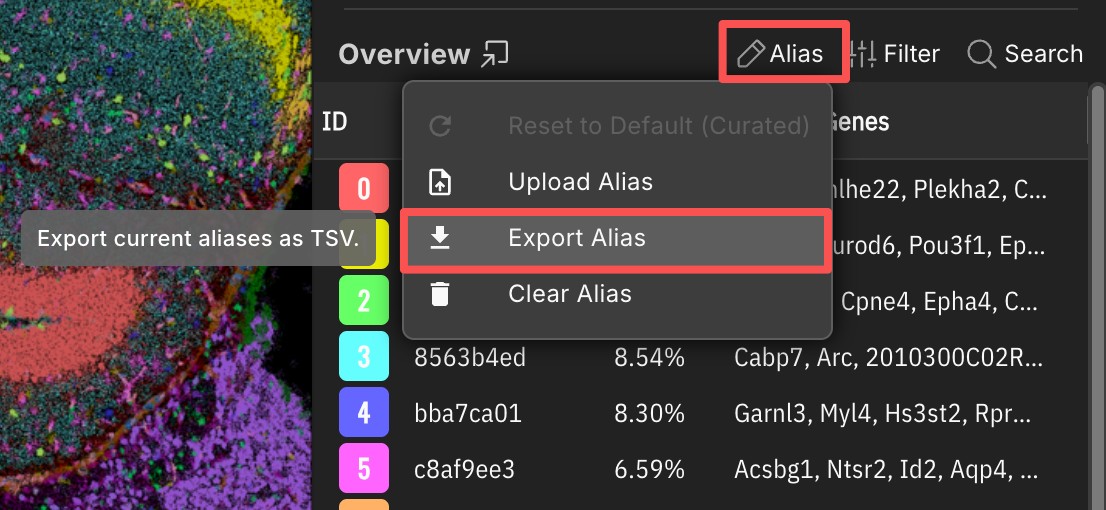
Related Pages
Concepts
Manual Pages
How-to Guides
2. Link Your Alias File in catalog.yaml
If you would like this alias file to be displayed as the default in CartoScope, please:
- specify it in
catalog.yaml, - upload the file to the AWS S3 directory or Zenodo repository that hosts this dataset.
Example catalog.yaml with Alias Files
In the example, we want to provide the curated_alias.tsv to the target_layer factor layer in the example_data dataset.
1 2 3 4 5 6 7 8 9 10 | |
aliasis the curated default alias table used as the Curated source.
Related Pages
Concepts
Manual Pages
How-to Guides