How to Upload Alias
This guide explains how to prepare an alias file and upload it to a factor layer in CartoScope.
1. Prepare Your Alias File
Alias File Format
- The file must be a tab-separated file (
.tsv) with one row per factor. - It should contain two columns:
- 1st column (header: either
indexorname): numeric factor indices. - 2nd column (header:
alias): alias names.
- 1st column (header: either
Example Alias File
1 2 3 4 | |
Prepare Alias File via CartoScope
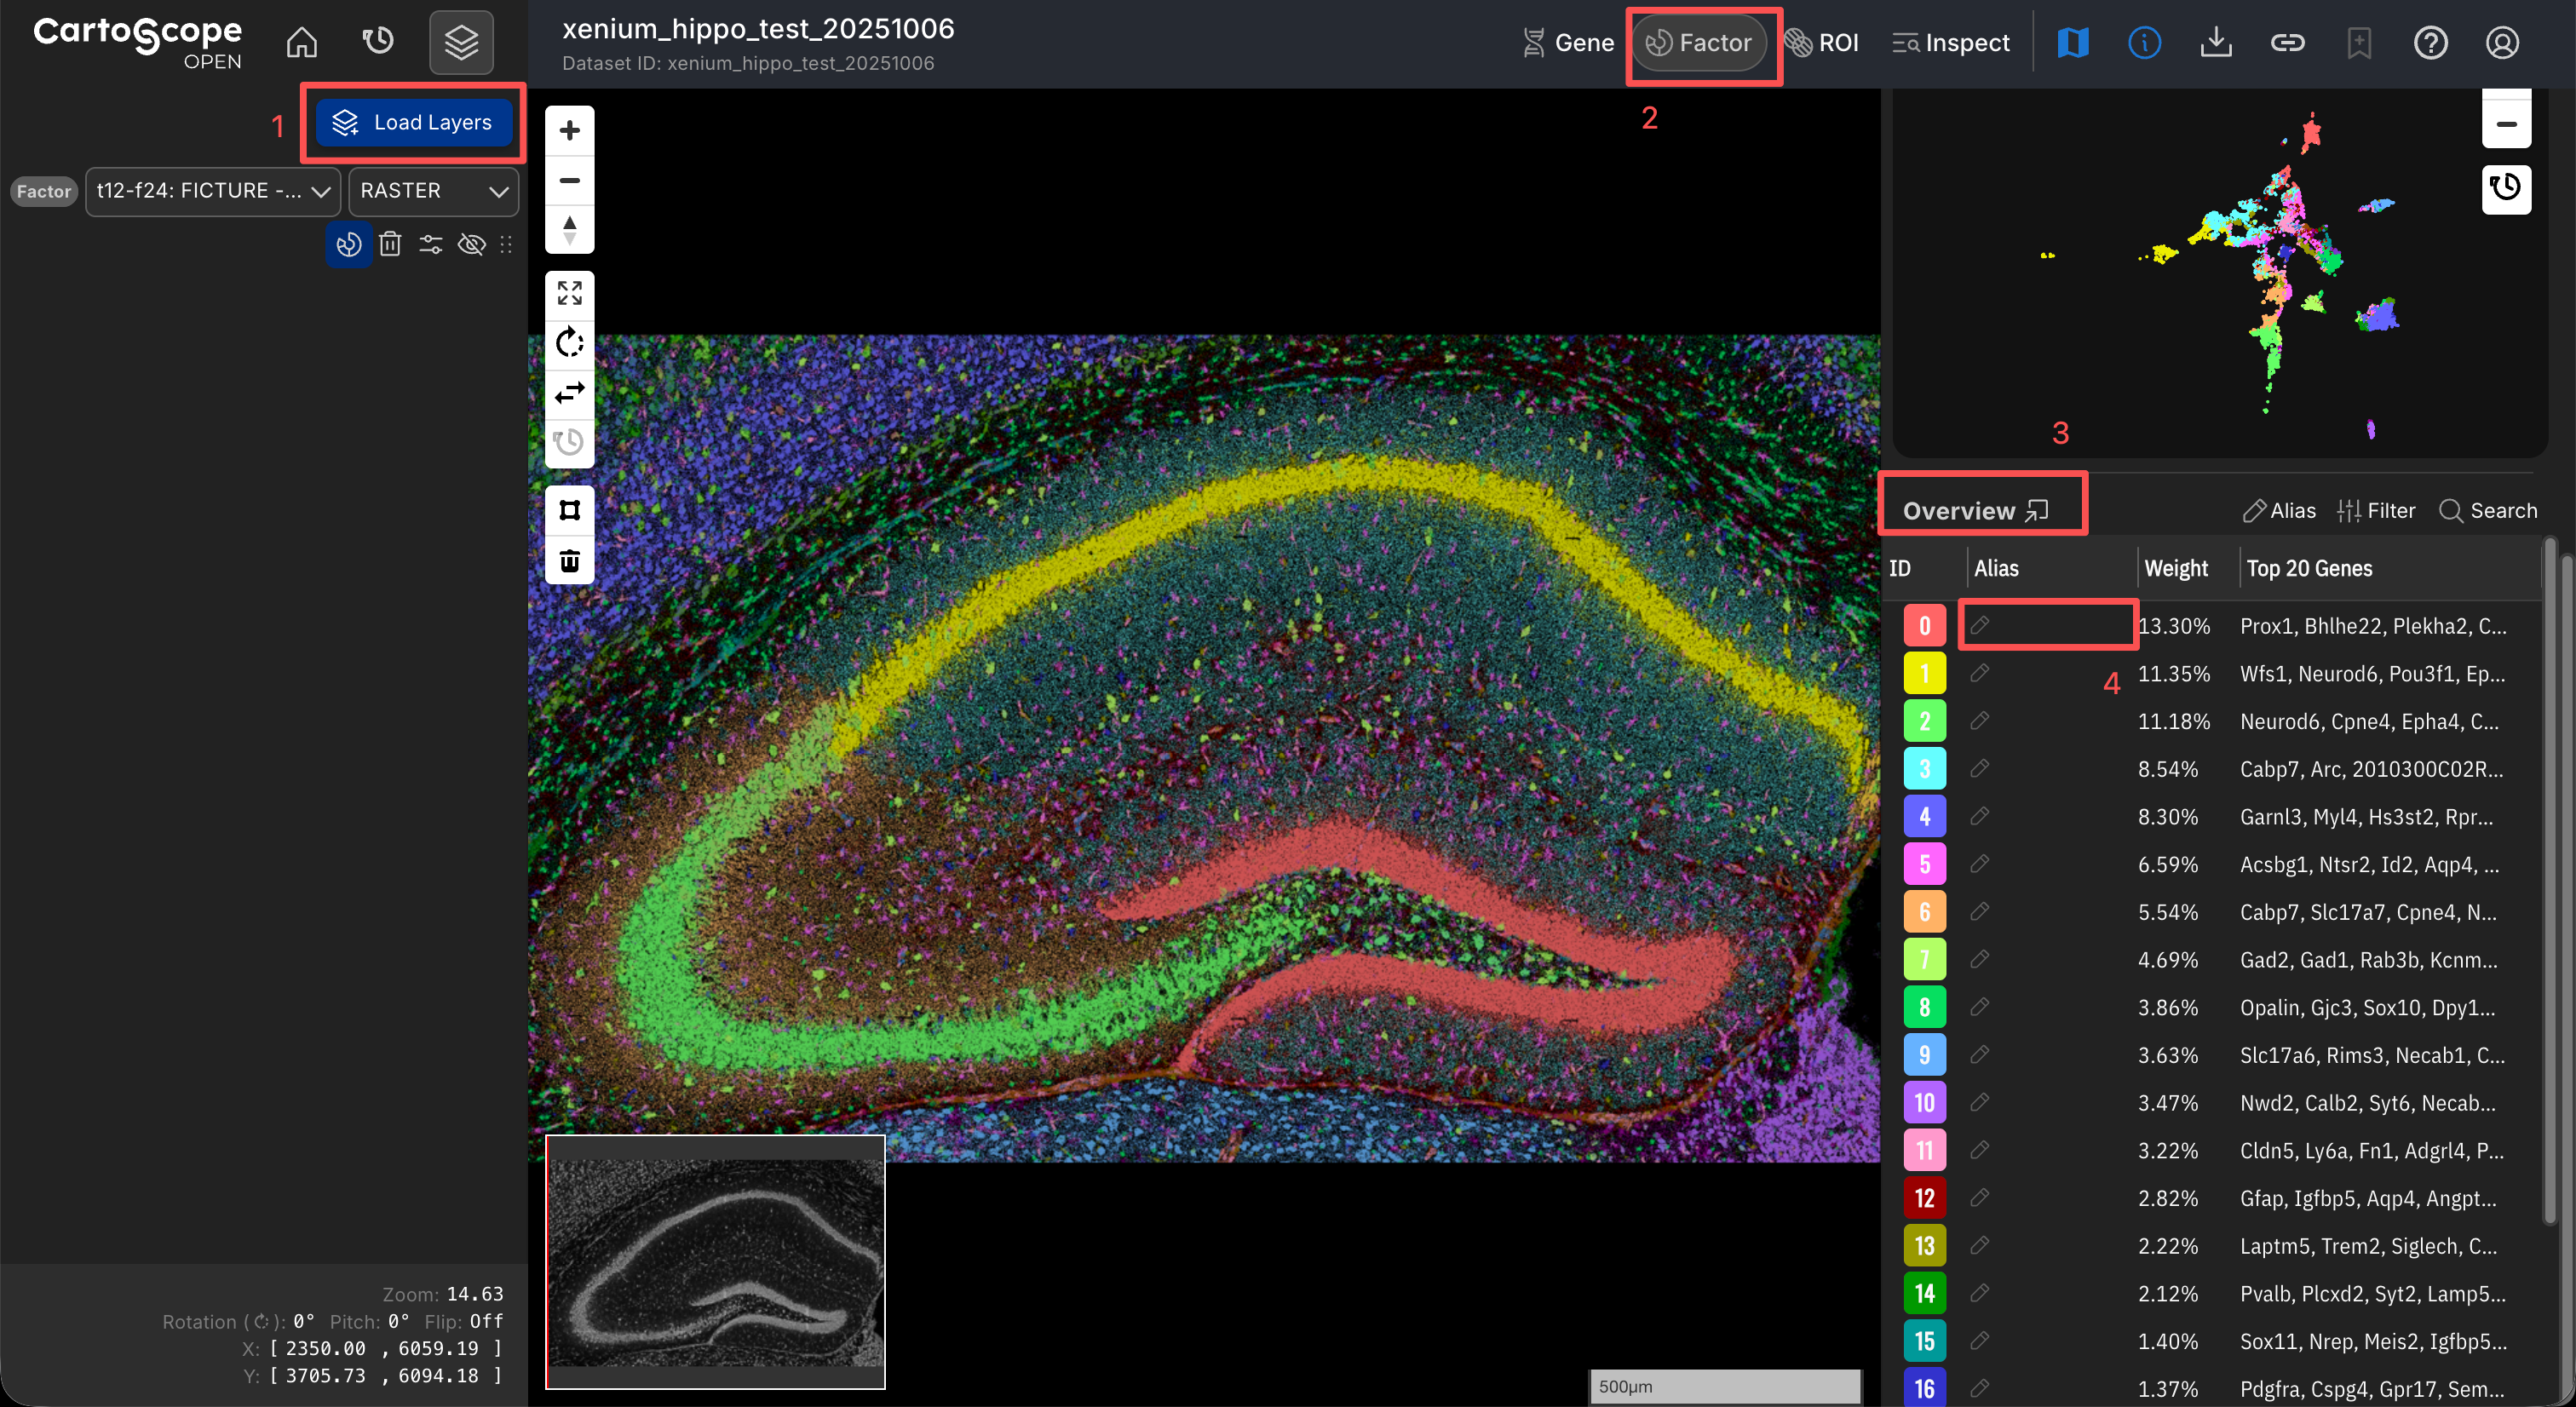
CartoScope offers a solution to prepare your alias file during exploration.
- Click the Load Layers button to load the factor layer you want to annotate.
- Open the Factor Drawer to display your target factor layer.
- Review the Overview Table to determine whether existing alias sources (e.g., curated or AI-inferred aliases) are available.
- To annotate a factor, double-click the corresponding cell and enter your desired label.
- Once all annotations are finalized, click the Alias button at the top of the Overview Table and select Export Alias to generate and download the
.tsvfile.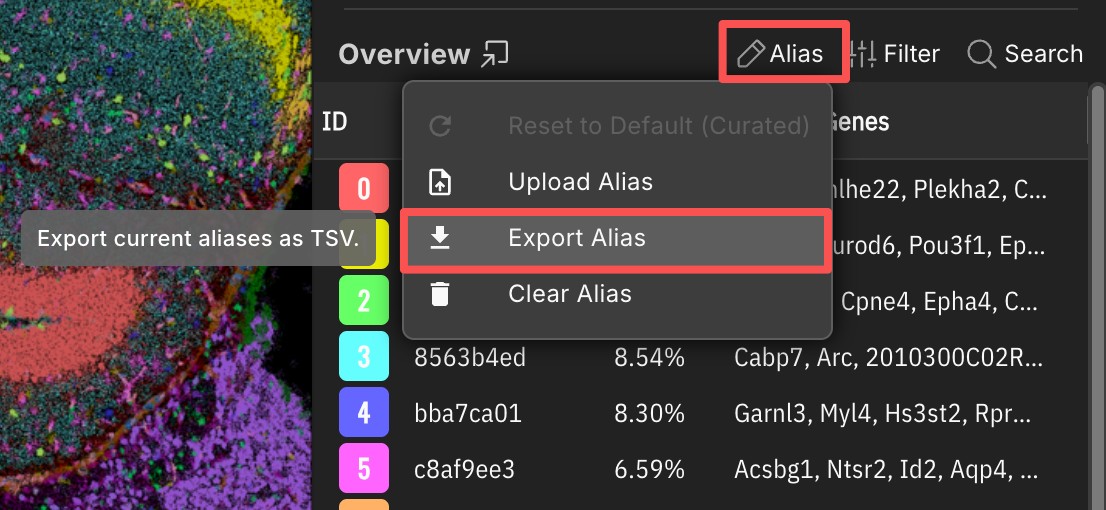
Related Pages
Concepts
Manual Pages
How-to Guides
2. Upload Your Alias File via Factor Drawer
Follow the steps below to upload your alias file:
- Open the Factor Drawer and select the factor layer you want to update.
- In the Overview Table, click the Alias button and choose the Upload Alias option in the dropdown list.
- In the file picker, select your prepared
.tsvfile. - The Factor Drawer now shows the uploaded alias:
- The Alias column in the Overview Table updates.
- Related factor views show the uploaded aliases.
- The alias source appears as Upload.
Tips
- If you want to modify a specific uploaded alias, double-click that alias in the Factor Drawer to activate edit mode, then modify it.
- If you want to return to the dataset default aliases, use Reset Alias to switch back to Curated aliases when available.
- If you want to remove the uploaded aliases, use Clear Alias to remove all aliases in the Factor Drawer.
Related Pages
Concepts
Manual Pages
How-to Guides