How to Create an ROI
This guide explains how to create a Region of Interest (ROI) to isolate specific areas for analysis.
1. Combine ROI tools to cover all desired regions.
- 1) Open the ROI drawer and go to "Create" tab.
- 2) Pick drawing tools from the Map Toolkit and combine them freely to cover all desired regions.
- Polygon Tool: Click on the map to place vertices, and double-click (or click back on the starting point) to close the polygon. Press Backspace or Delete while drawing to remove points in progress. Live measurements (perimeter and area) are displayed in the top options bar.
- Tissue Wand: Automatically outline tissue from raster layers. Configure parameters in the top options bar, click an island on the map or click Run, then click Add to add the detected outline.
- Brush Tool: Click and drag across the map to paint and add area onto the shape.
- Eraser Tool: Click and drag across the shape to carve area out of the shape.
Combine multiple shapes into one ROI
You can combine tools freely (e.g. use the Tissue Wand to auto-detect tissue, carve tears with the Eraser, and touch up with the Brush) and draw multiple separate shapes. All drawn shapes will be included together in this single ROI.
Add shape from Tissue wand detection
You must click Add button to add shape from Tissue wand detection. Otherwise, the shape will not be included in the shape list.
Keyboard shortcut
- You can press Enter to add shape from Tissue wand detection.
- You can press Backspace or Delete to remove the last point while drawing a polygon.
- You can press [ and ] to adjust the brush and eraser size.
- You can press Esc to cancel the current drawing.
2. Refine the ROI.
All shapes will be shown in the shape list, where you can delete or refine shapes. See How to Refine an ROI.
3. Define the ROI.
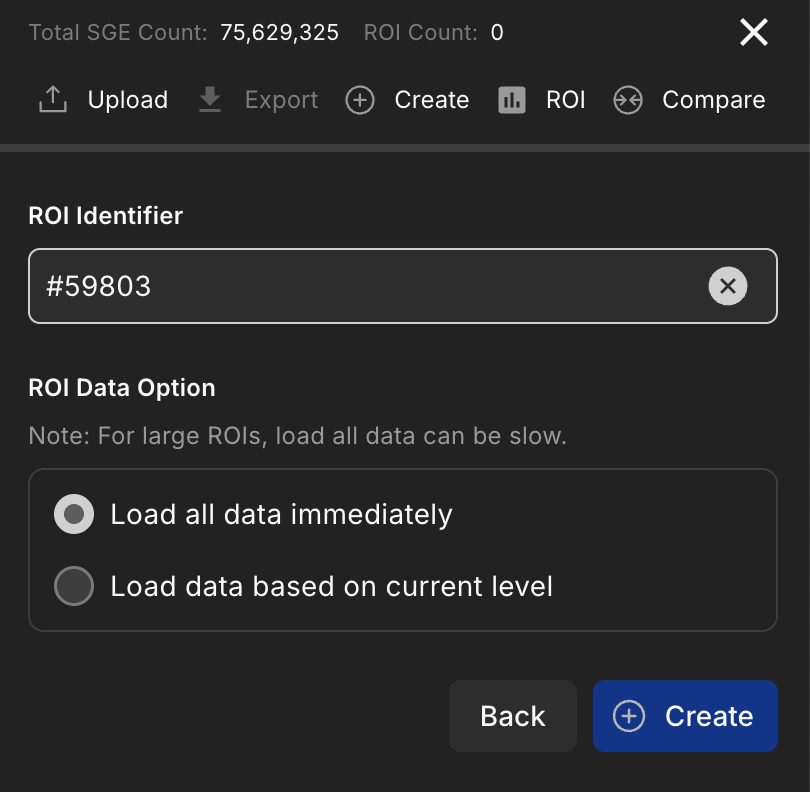
Once all shapes are done, define ROI: - Name: Enter a name for the ROI in the Identifier field. - Data Source: Select the desired ROI Data Loading Option. - Create: Click Create to finalize the ROI.
3. View the ROI details.
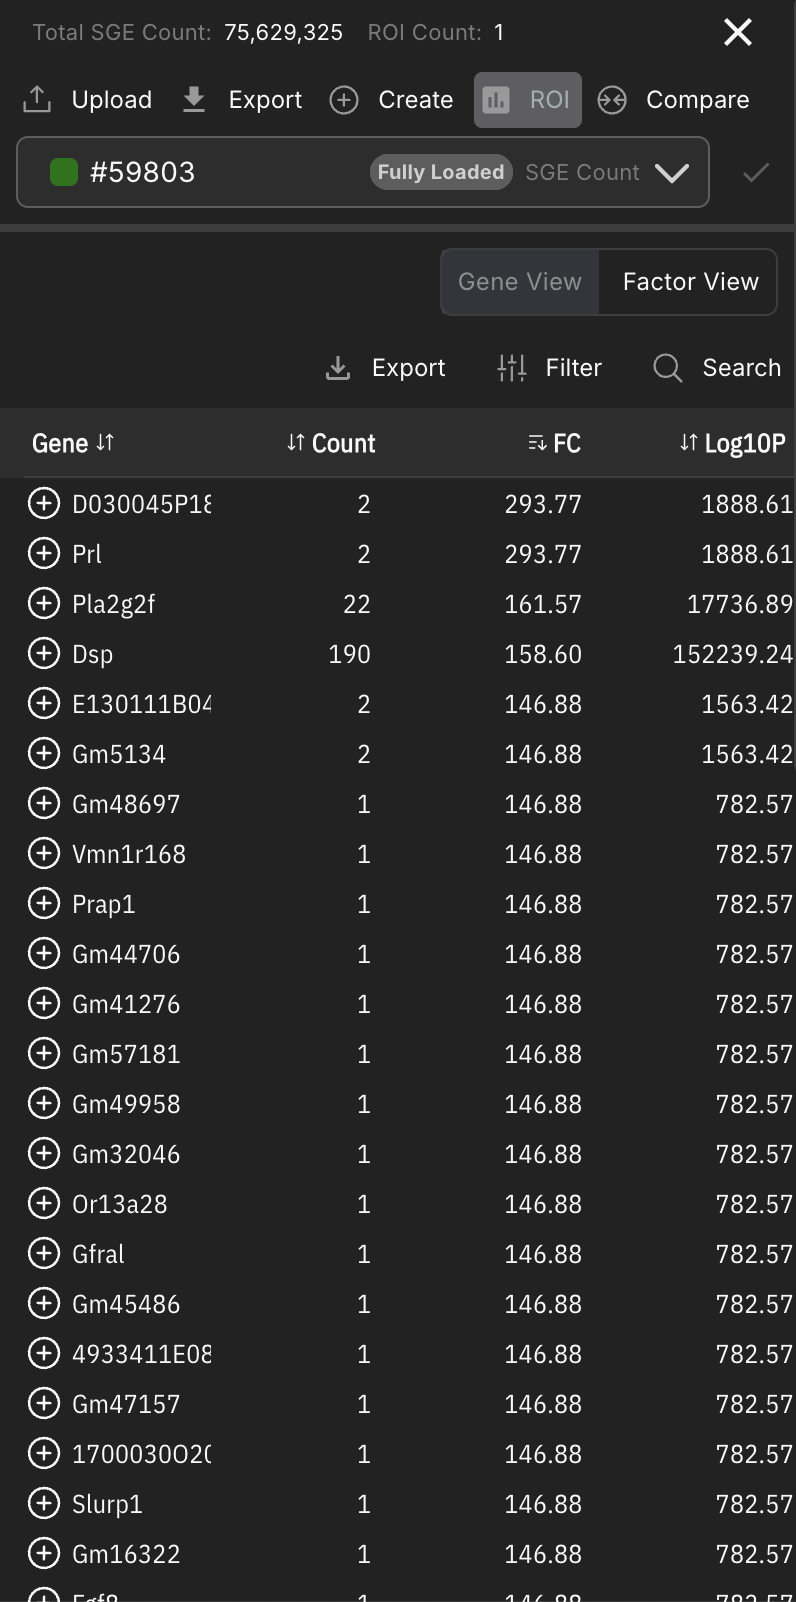
- Export: Click Export to download ROI coordinates and associated data.
- Inspect: Use the Filter or Search functions to find specific markers, or sort the table by clicking column headers.
Related Pages
Concepts
- What are Tissue Wand Parameters?
- What are Layer Types?
- What are ROI Loading Data Options?
- What is Total Transcripts?
Manual Pages
How-to Guides
FAQs