How to Add a Gene Group
This guide explains how to combine multiple genes into a single visualization layer (Gene Group).
1. Create a Gene Group Layer
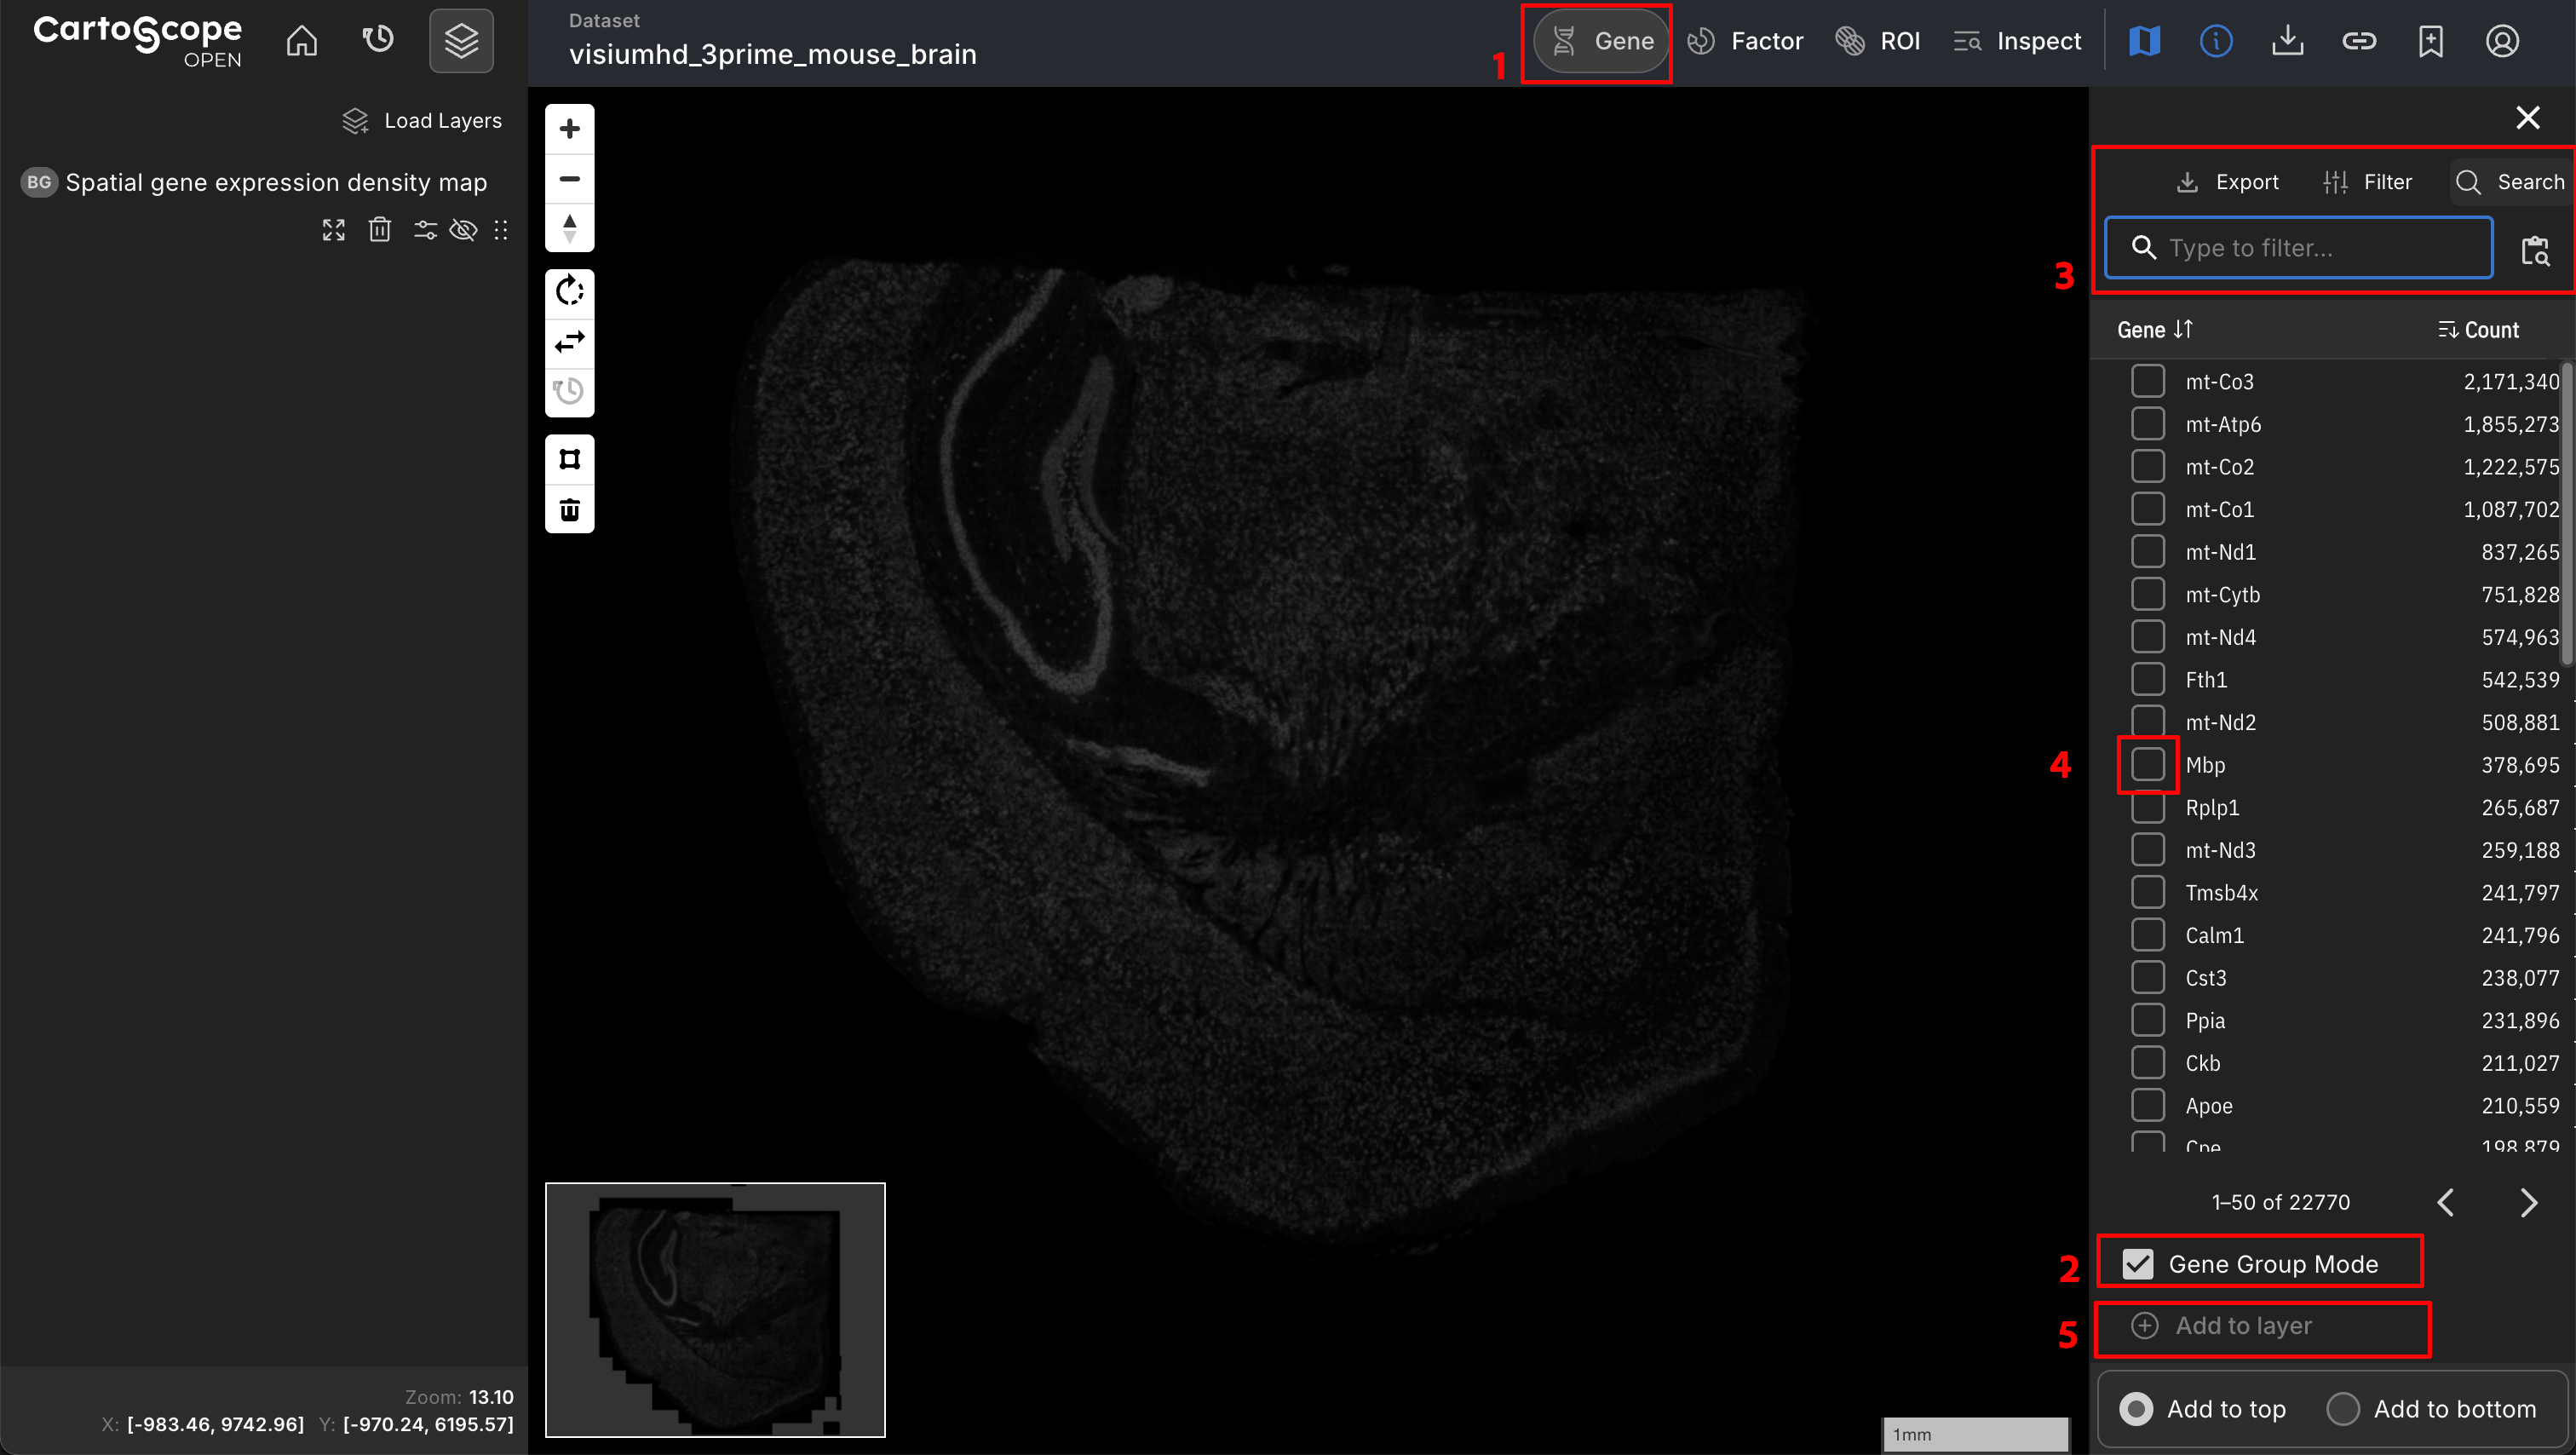
- 1) Open Gene Drawer: Click the Gene button in the Top Bar to open the Gene Drawer.
- 2) Enable Group Mode: Toggle the Gene Group Mode switch to ON.
- 3) Locate Genes: Use the search bar, filter options, or column sorting to find the genes you want to include.
- 4) Add Genes: Click each gene to add it to your current selection.
- 5) Create Layer: When you have selected at least one gene, the Add to layer button will activate and change to Add N Genes to layer (where N is the number of genes selected). Click Add N Genes to layer to create the gene group layer.

2. Customize Gene Group Layer
Now, the expression of all genes in the gene group are rendered in the same color (in this example, blue) and visualized on the central map.
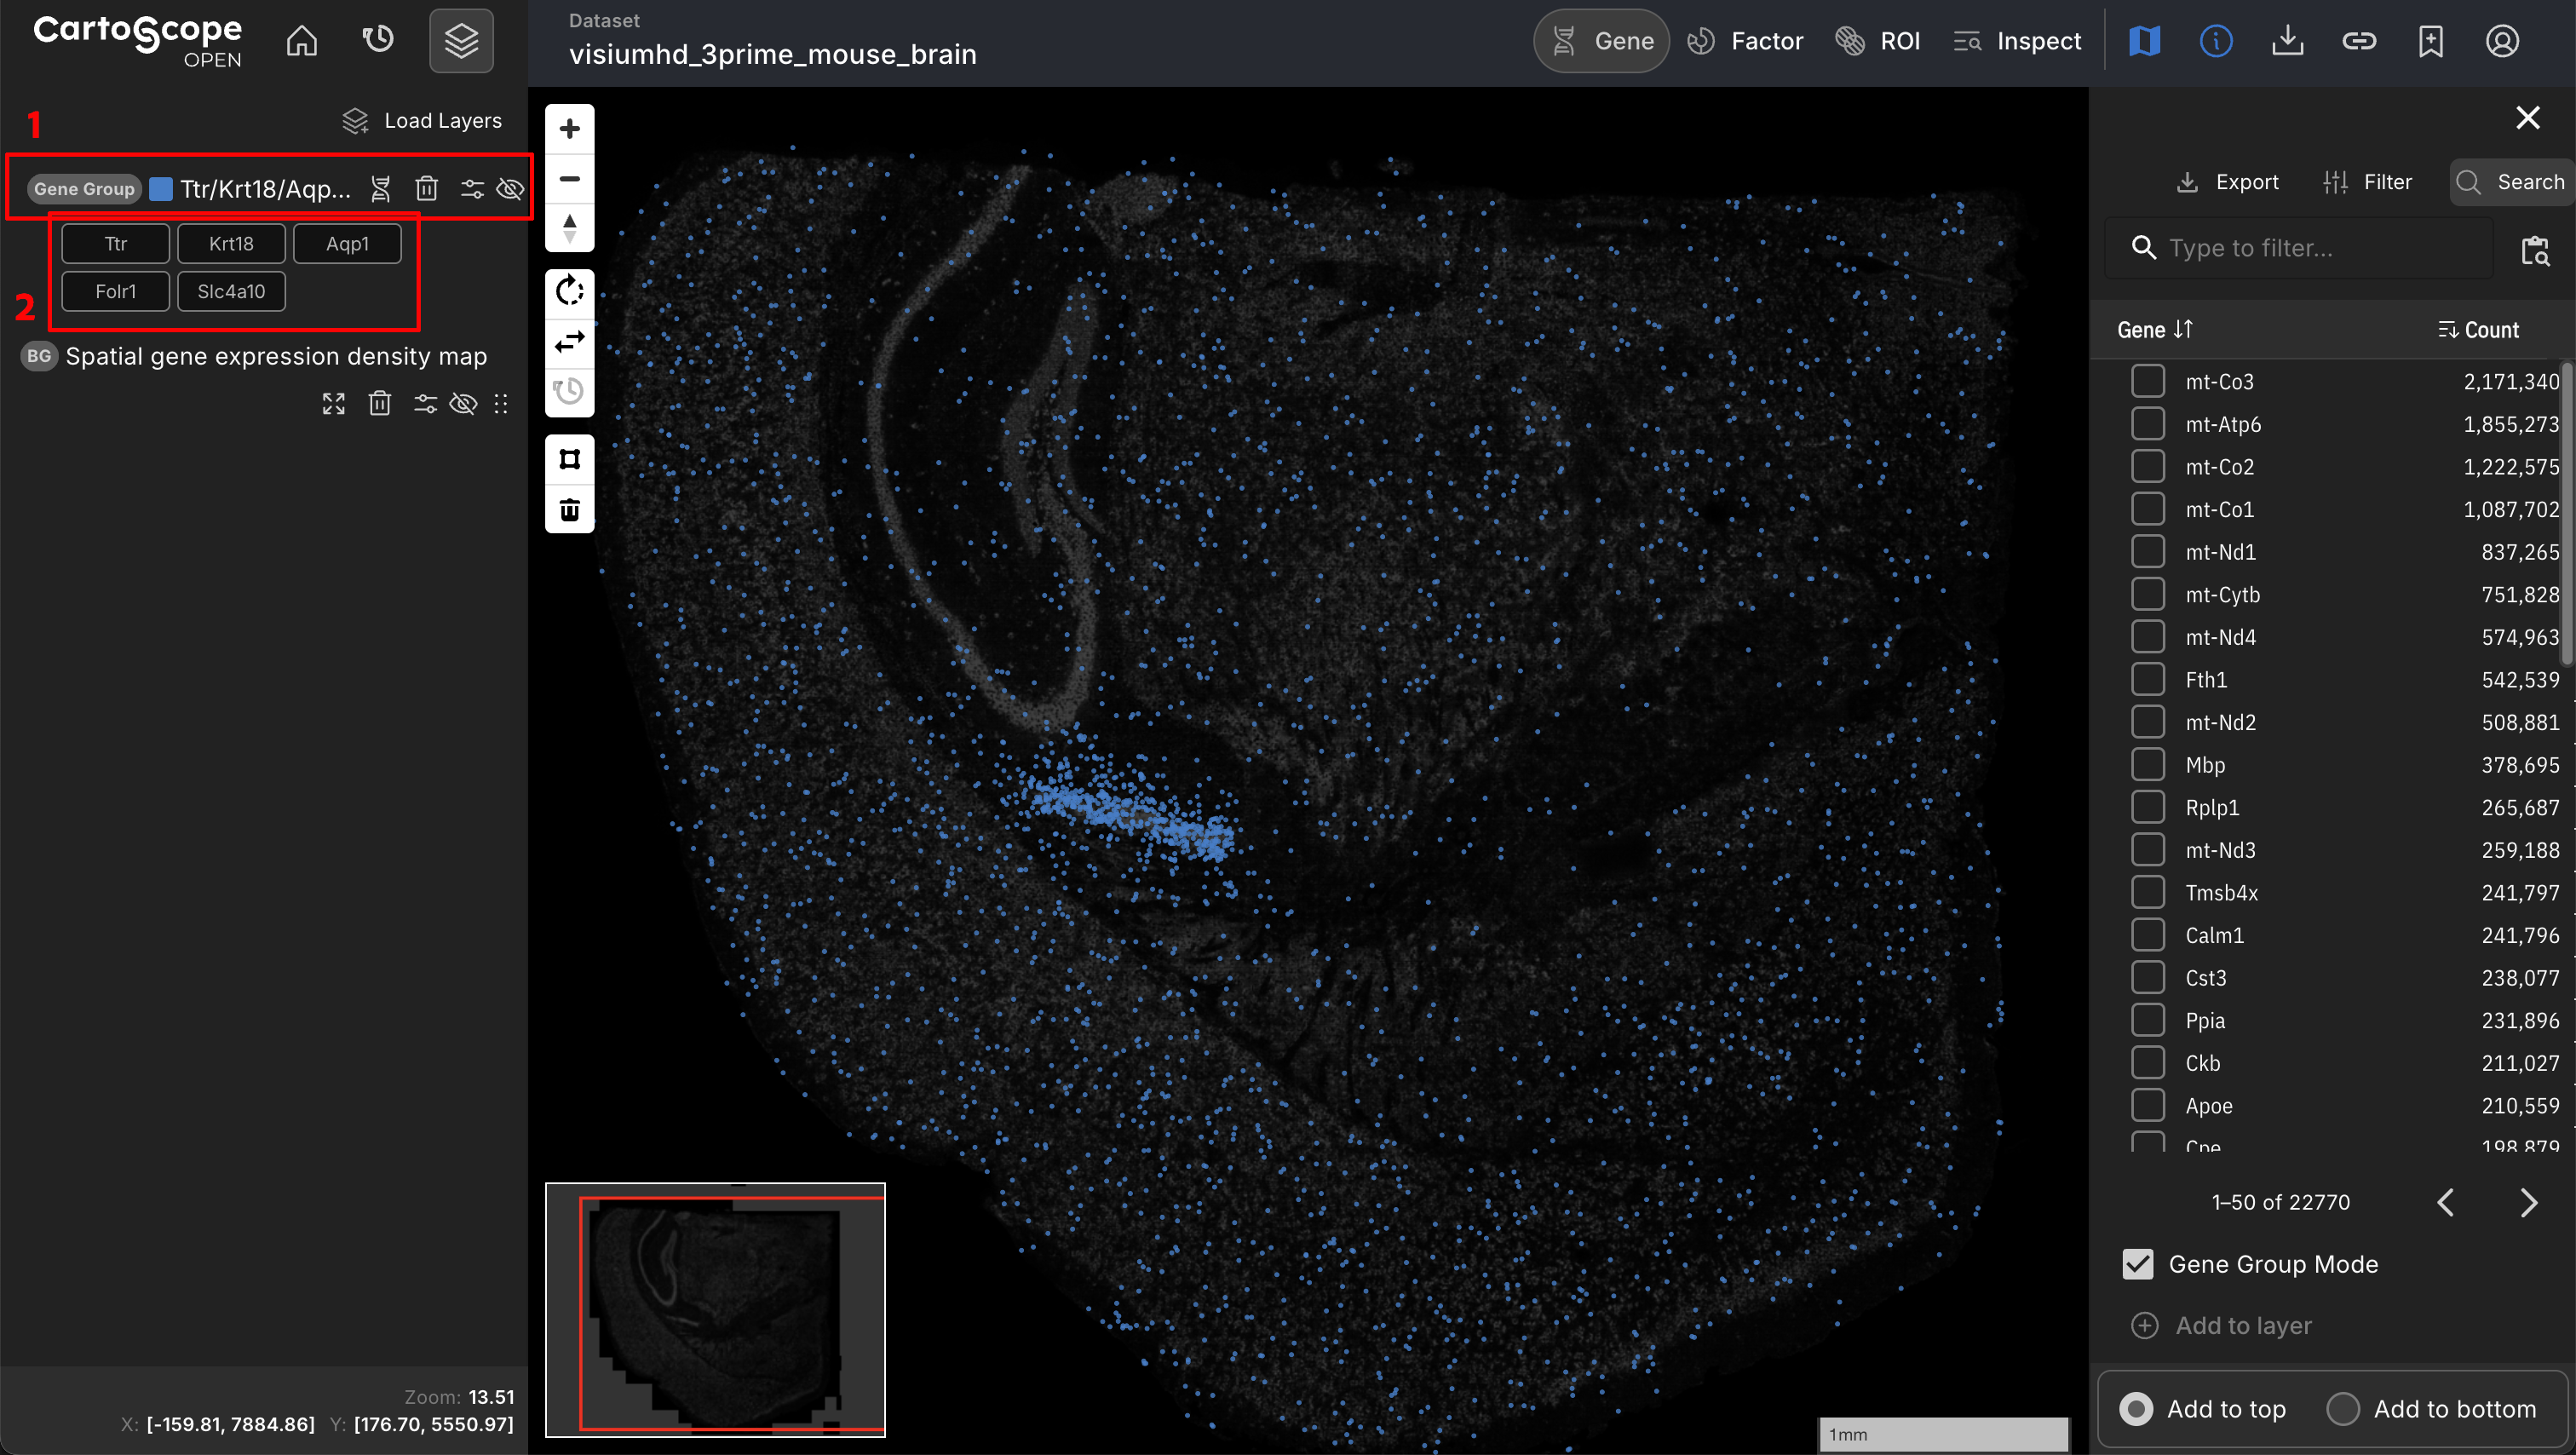
- 1) Gene Group Layer: The gene group appears as a single layer in the Layer Drawer. You can manage its visibility, opacity, and order just like any other layer.
- 2) Customize Genes within the Gene Group Layer: In the Layer Drawer, each gene group displays all included genes as cards. Click a card to mute or unmute a specific gene.
Related Pages
Concepts
Manual Pages